|
This document is under active development and discussion!
If you find errors or omissions in this document, please don’t hesitate to
submit an issue or
open a pull request with
a fix. We also encourage you to ask questions and discuss any aspects of the project on the
mailing lists or IRC.
New contributors are always welcome!
|
Preface
This guide shows you how to get started with Apache Syncope services for identity management, provisioning, and compliance.
1. Introduction
Apache Syncope is an Open Source system for managing digital identities in enterprise environments, implemented in Java EE technology and released under the Apache 2.0 license.
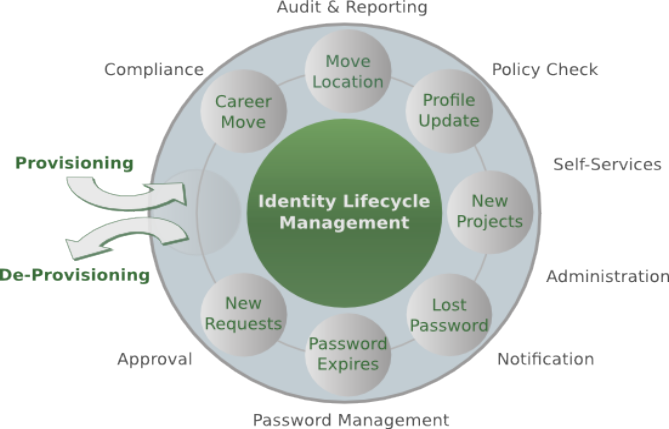
Identity Management (or IdM) means to manage user data on systems and applications, using the combination of business processes and IT. IdM involves considering user attributes, roles, resources and entitlements in trying to answer the following thorny question:
Who has access to What, When, How, and Why?
1.1. What is Identity Management, anyway?
Have you ever been hired by a company, entered an organization or just created a new Google account? Companies, organizations and cloud entities work with applications that need your data to function properly: username, password, e-mail, first name, surname, and more.
Where is this information going to come from? And what happens when you need to be enabled for more applications? And what if you get promoted and acquire more rights on the applications you already had access to? Most important, what happens when you quit or they gently let you go?
In brief, Identity Management takes care of managing identity data throughout what is called the Identity Lifecycle.
1.2. Identity and Access Management - Reference Scenario
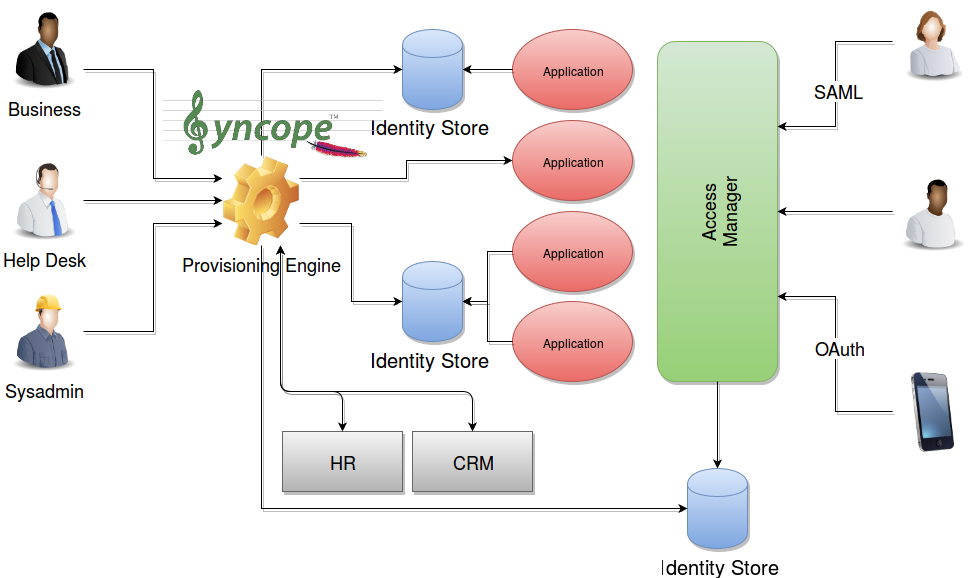
The picture above shows the technologies involved in a complete IAM solution:
-
Identity Store (as RDBMS, LDAP, Active Directory, meta- and virtual-directories) - the repository for account data
-
Provisioning Engine - synchronizes account data across Identity Stores and a broad range of data formats, models, meanings and purposes
-
Access Manager - access mediator to all applications, focused on application front-end, taking care of authentication (Single Sign-On), authorization (OAuth, XACML) and federation (SAML, OpenID Connect).
|
From a technology point of view, Apache Syncope is primarily a Provisioning Engine. |
1.2.1. Aren’t Identity Stores enough?
One might suppose that a single Identity Store can solve all the identity needs inside an organization, but there are a few drawbacks with this approach:
-
Heterogeneity of systems
-
Lack of a single source of information (HR for corporate id, Groupware for mail address, …)
-
Often applications require a local user database
-
Inconsistent policies across the infrastructure
-
Lack of workflow management
-
Hidden infrastructure management cost, growing with the size of the organization
1.3. A bird’s eye view on the Architecture
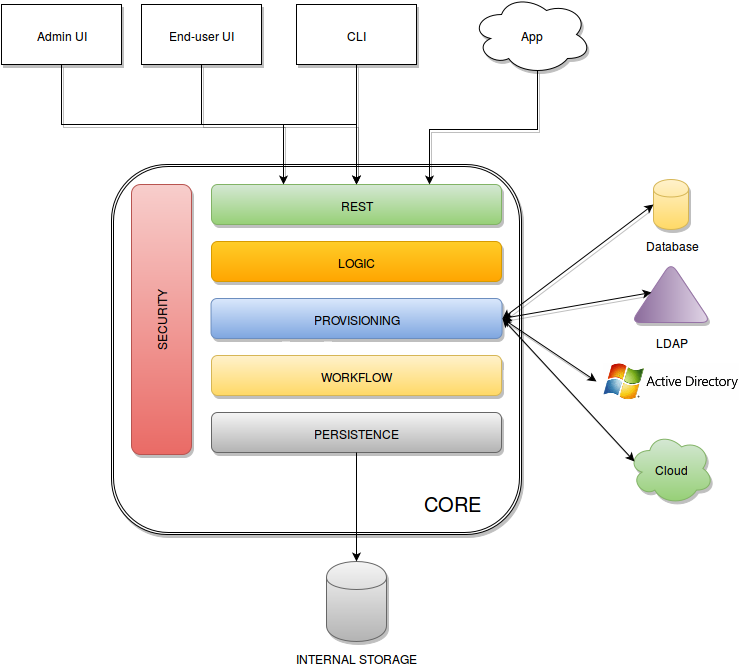
Admin UI is the web-based console for configuring and administering running deployments, with full support for delegated administration.
End-user UI is the web-based application for self-registration, self-service and password reset.
CLI is the command-line application for interacting with Apache Syncope from scripts, particularly useful for system administrators.
Core is the central component, providing all services offered by Apache Syncope.
It exposes a fully-compliant JAX-RS 2.0
RESTful interface which enables third-party applications,
written in any programming language, to consume IdM services.
-
Logic implements the overall business logic that can be triggered via REST services, and controls some additional features (notifications, reports and auditing)
-
Provisioning is involved with managing the internal (via workflow) and external (via specific connectors) representation of Users, Groups and Any Objects.
This component often needs to be tailored to meet the requirements of a specific deployment, as it is the crucial decision point for defining and enforcing the consistency and transformations between internal and external data. The default all-Java implementation can be extended for this purpose. In addition, an Apache Camel-based implementation is also available as an extension, which brings all the power of runtime changes and adaptation. -
Workflow is one of the pluggable aspects of Apache Syncope: this lets every deployment choose the preferred engine from a provided list - including one based on Flowable, the reference open source BPMN 2.0 implementations - or define new, custom ones.
-
Persistence manages all data (users, groups, attributes, resources, …) at a high level using a standard JPA 2.2 approach. The data is persisted to an underlying database, referred to as Internal Storage. Consistency is ensured via the comprehensive transaction management provided by the Spring Framework.
Globally, this offers the ability to easily scale up to a million entities and at the same time allows great portability with no code changes: MySQL, MariaDB, PostgreSQL, Oracle and MS SQL Server are fully supported deployment options. -
Security defines a fine-grained set of entitlements which can be granted to administrators, thus enabling the implementation of delegated administration scenarios.
Third-party applications are provided full access to IdM services by leveraging the REST interface, either via the Java Client Library (the basis of Admin UI, End-user UI and CLI) or plain HTTP calls.
2. System Requirements
2.1. Hardware
The hardware requirements depend greatly on the given deployment, in particular the total number of managed entities (Users, Groups and Any Objects), their attributes and resources.
-
CPU: dual core, 2 GHz (minimum)
-
RAM: 2 GB (minimum)
-
Disk: 100 MB (minimum)
2.2. Java
Apache Syncope 2.1.15-SNAPSHOT requires the latest JDK 8 that is available.
2.3. Java EE Container
Apache Syncope 2.1.15-SNAPSHOT is verified with the following Java EE containers:
2.4. Internal Storage
Apache Syncope 2.1.15-SNAPSHOT is verified with the recent versions of the following DBMSes, for internal storage:
-
PostgreSQL (>= 12, JDBC driver >= 42.7.2)
-
MariaDB (>= 10, JDBC driver >= 3.0.8)
-
MySQL (>= 8.0, JDBC driver >= 8.0.28)
-
Oracle Database (>= 11g, JDBC driver >= ojdbc8 12.2.0.1)
-
MS SQL Server (>= 2017, JDBC driver >= 12.4.1.jre8)
3. Obtain Apache Syncope
There are several ways to obtain Apache Syncope: each of which has advantages or caveats for different types of users.
3.1. Standalone
The standalone distribution is the simplest way to start exploring Apache Syncope: it contains a fully working, in-memory Tomcat-based environment that can be easily grabbed and put at work on any modern laptop, workstation or server.
|
Target Audience
First approach, especially with administration console and end-user; does not require technical skills.Not meant for any production environment. |
Getting ready in a few easy steps:
-
download the standalone distribution
-
unzip the distribution archive
-
go into the created Apache Tomcat directory
-
start Apache Tomcat
-
GNU / Linux, Mac OS X
$ chmod 755 ./bin/*.sh $ ./bin/startup.sh -
Windows
> bin/startup.bat
-
| Please refer to the Apache Tomcat documentation for more advanced setup and instructions. |
3.1.1. Components
The set of provided components, including access URLs and credentials, is the same as reported for
embedded mode, with the exception of log files, available here under $CATALINA_HOME/logs.
|
Internal Storage
By default, the standalone distribution is configured to use an in-memory database instance. This means that every time Tomcat is shut down all changes that have been made are lost. If you want instead to make your changes persistent, replace with in Please refer to the H2 documentation for more options. |
3.2. Debian packages
Debian packages are available for use with Debian GNU / Linux, Ubuntu and their derivatives.
|
Target Audience
Getting up and running quickly on Debian / Ubuntu.Difficult to extend beyond pre-sets. |
- Download
-
Download the latest .deb packages
- Prepare
-
-
Install Apache Tomcat 8
$ sudo apt-get install tomcat8 -
Install PostgreSQL packages for your actual Debian / Ubuntu distribution:
-
postgresql-10 -
postgresql-client-10
-
-
Use the PostgreSQL JDBC driver with Tomcat
$ cd /usr/share/tomcat8/lib/ && sudo wget https://central.maven.org/maven2/org/postgresql/postgresql/42.7.2/postgresql-42.7.2.jar -
Replace
JAVA_OPTSin/etc/default/tomcat8with the following:JAVA_OPTS="-Djava.awt.headless=true -Dfile.encoding=UTF-8 -server \ -Xms1536m -Xmx1536m -XX:NewSize=256m -XX:MaxNewSize=256m -XX:PermSize=256m -XX:+DisableExplicitGC \ -Djava.security.egd=file:/dev/./urandom"
-
- Install
-
-
Stop Tomcat
$ sudo service tomcat8 stop -
Install Apache Syncope core, console and enduser via the downloaded packages
$ sudo dpkg -i apache-syncope-*.deb -
Create a database for use with Apache Syncope
$ sudo SYNCOPE_USER="syncope" SYNCOPE_PASS="syncope" sh /usr/share/apache-syncope/dbinit-postgresql.sh -
Start Tomcat
$ sudo service tomcat8 start
-
3.2.1. Components
The following assumes that protocol, host and port reflect your Apache Tomcat installation.
|
Log files |
Available under |
ConnId bundles |
Available under |
Complete REST API reference |
protocol://host:port/syncope/index.html |
Swagger UI |
protocol://host:port/syncope/swagger/ |
Administration console |
protocol://host:port/syncope-console/ |
End-user UI |
protocol://host:port/syncope-enduser/ |
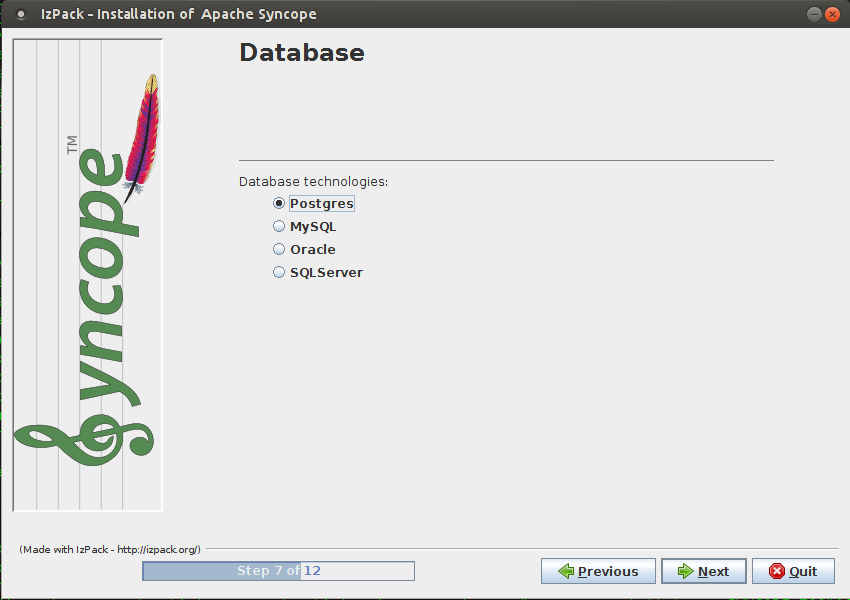
3.3. GUI Installer
GUI application for configuring and deploying Apache Syncope on supported DBMSes and Java EE containers.
|
Target Audience
Getting up and running quickly on any supported DBMS and Java EE container, independently from the underlying
operating system.Difficult to extend beyond pre-sets. |
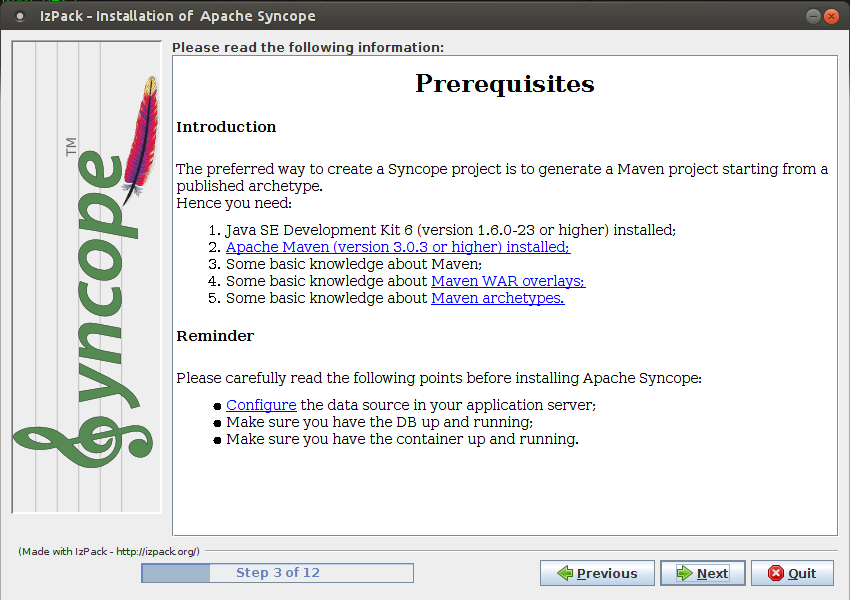
3.3.1. Prerequisites
-
Apache Maven (version 3.0.3 or higher) installed
-
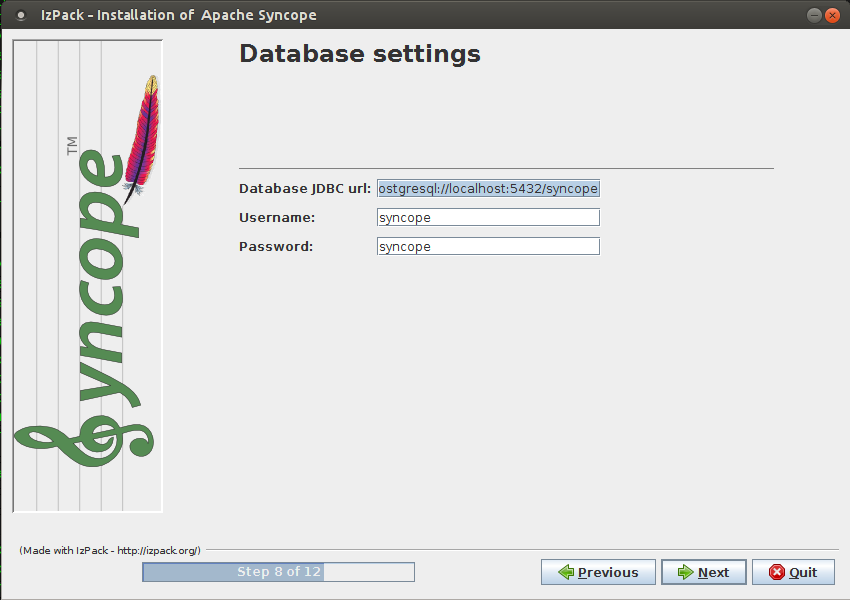
one of the supported DBMSes up and running, and an empty database instance for usage with Apache Syncope (you will be requested for JDBC URL, username and password)
-
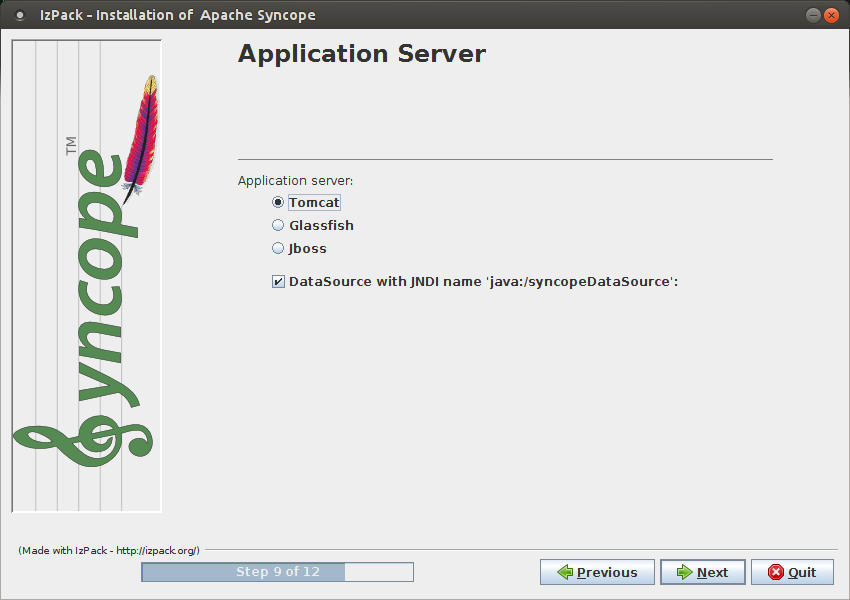
one of the supported Java EE containers up and running
-
a datasource with the name
syncopeMasterDataSourceconfigured in the selected Java EE container and the database instance mentioned above
|
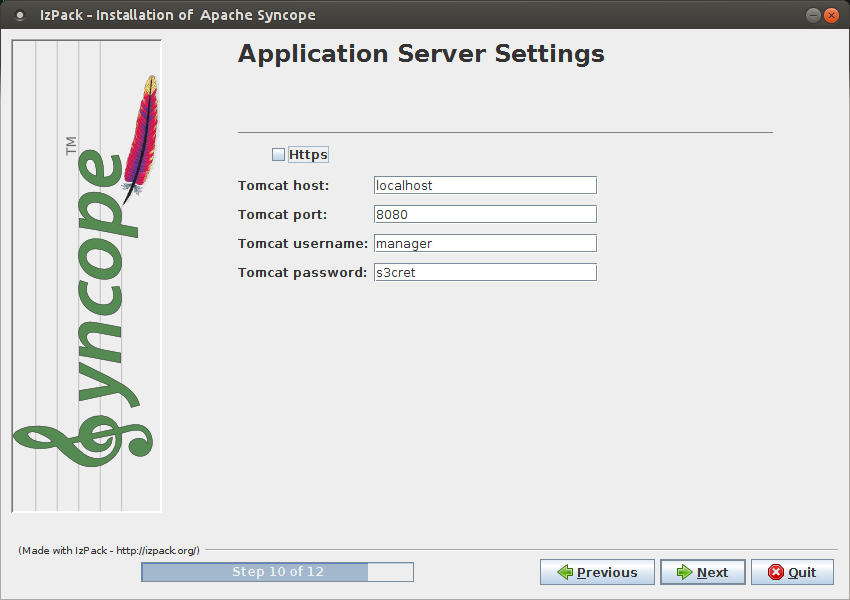
Ensure that the The actual configuration steps vary significantly depending on the selected Java EE container; here are some examples: |
|
When deploying on Apache Tomcat, don’t forget to configure a |
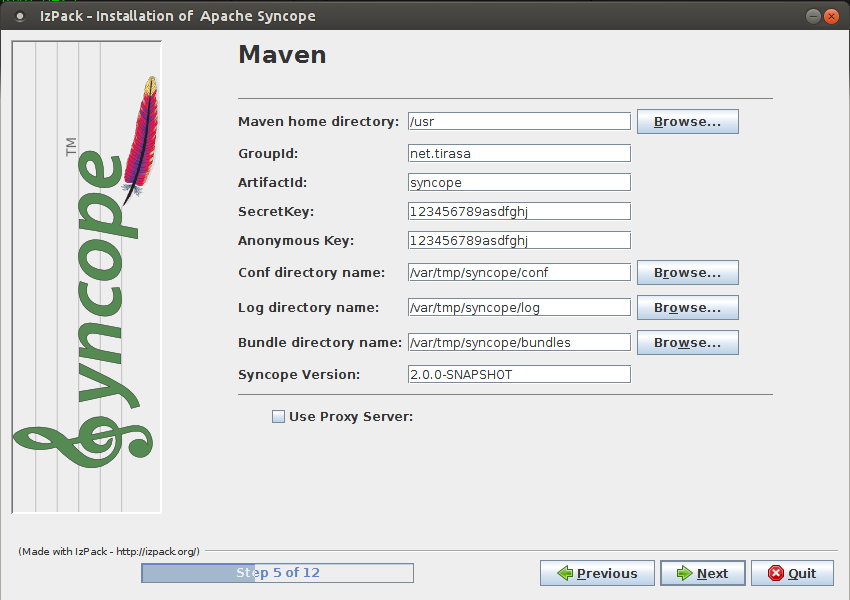
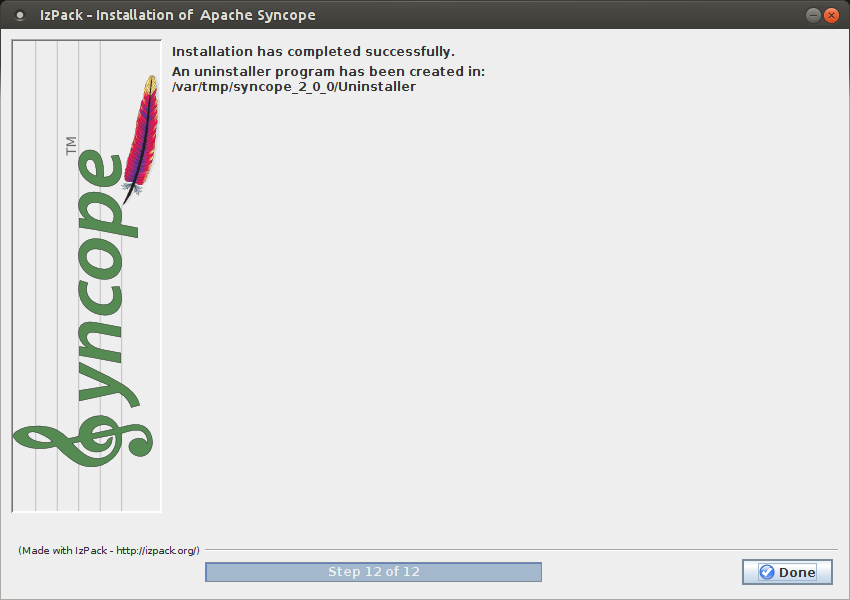
3.3.2. Usage
Once downloaded, double-click the JAR file or execute via the command-line:
java -jar syncope-installer-*-uber.jar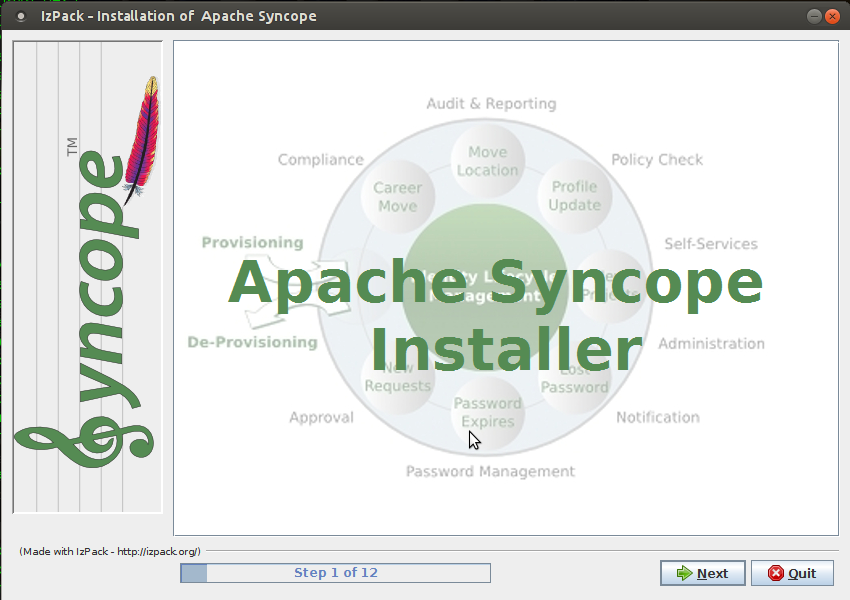

3.3.3. Components
The following assumes that protocol, host and port reflect your Java EE container installation.
|
Complete REST API reference |
protocol://host:port/syncope/index.html |
Swagger UI |
protocol://host:port/syncope/swagger/ |
Administration console |
protocol://host:port/syncope-console/ |
End-user UI |
protocol://host:port/syncope-enduser/ |
3.4. Docker
Docker images ready to use, published to Docker Hub.
|
Target Audience
Getting up and running quickly on Docker.All configurations available to set, difficult customizations. |
| Working with these images requires to have Docker correctly installed and configured. |
| The Docker images can be used with orchestration tools as Docker Compose or Kubernetes. |
3.4.1. Docker images
Core
Apache Syncope Core, see above for information.
Port exposed: 8080.
Environment variables:
-
DBMS: which type of relational DBMS is to be used as internal storage for Syncope Core; valid values arepostgresql,mariadb,mssql,mysql -
DB_URL: JDBC URL of internal storage -
DB_USER: username for internal storage authentication -
DB_PASSWORD: password for internal storage authentication -
DB_POOL_MAX: internal storage connection pool: ceiling -
DB_POOL_MIN: internal storage connection pool: floor -
OPENJPA_REMOTE_COMMIT: configure multiple instances, with high availability; valid values are the ones accepted by OpenJPA for remote event notification includingsjvm(single instance)
Console
Apache Syncope Admin UI, see above for information.
Port exposed: 8080.
Environment variables:
-
CORE_SCHEME: URL scheme to connect to Syncope Core; valid values arehttporhttps -
CORE_HOST: host name or IP address to connect to Syncope Core -
CORE_PORT: port number to connect to Syncope Core
Enduser
Apache Syncope Enduser UI, see above for information.
Port exposed: 8080.
Environment variables:
-
CORE_SCHEME: URL scheme to connect to Syncope Core; valid values arehttporhttps -
CORE_HOST: host name or IP address to connect to Syncope Core -
CORE_PORT: port number to connect to Syncope Core -
DOMAIN: Syncope Core’s domain to work with
3.4.2. Docker Compose samples
Besides the one reported below, more samples are available.
The docker-compose.yml below will create and connect 4 Docker containers to provide a full-fledged, single
instance, Apache Syncope deployment. All referenced images are available on Docker Hub.
version: '3.3'

services:
   db: (1)
     image: postgres:latest
     restart: always
     environment:
       POSTGRES_DB: syncope
       POSTGRES_USER: syncope
       POSTGRES_PASSWORD: syncope

   syncope: (2)
     depends_on:
       - db
     image: apache/syncope:2.1.15-SNAPSHOT
     ports:
       - "18080:8080"
     restart: always
     environment:
       DBMS: postgresql
       DB_URL: jdbc:postgresql://db:5432/syncope
       DB_USER: syncope
       DB_PASSWORD: syncope
       DB_POOL_MAX: 10
       DB_POOL_MIN: 2
       OPENJPA_REMOTE_COMMIT: sjvm

   syncope-console: (3)
     depends_on:
       - syncope
     image: apache/syncope-console:2.1.15-SNAPSHOT
     ports:
       - "28080:8080"
     restart: always
     environment:
       CORE_SCHEME: http
       CORE_HOST: syncope
       CORE_PORT: 8080

   syncope-enduser: (4)
     depends_on:
       - syncope
     image: apache/syncope-enduser:2.1.15-SNAPSHOT
     ports:
       - "38080:8080"
     restart: always
     environment:
       CORE_SCHEME: http
       CORE_HOST: syncope
       CORE_PORT: 8080
DOMAIN: Master| 1 | Database container for usage as internal storage, based on latest PostgreSQL image available |
| 2 | Apache Syncope Core, single instance, port 18080 exposed |
| 3 | Apache Syncope Admin UI, port 28080 exposed |
| 4 | Apache Syncope Enduser UI, port 38080 exposed, working with Master domain |
How to start the containers:
-
Save the example file locally.
-
Download and start the containers:
$ docker-compose -f /path/to/docker-compose.yml up
The following services will be available:
Complete REST API reference |
|
Swagger UI |
|
Administration console |
http://localhost:28080/syncope-console |
End-user UI |
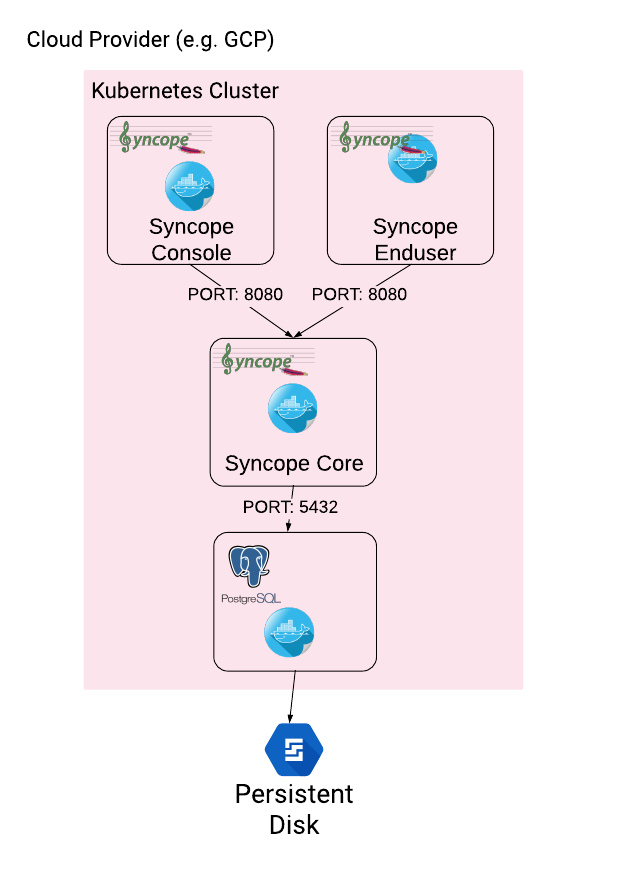
3.4.3. Kubernetes sample
A set of example Helm charts is available, that can be used to install Apache Syncope directly in Kubernetes.
Some assumptions are made:
-
a working Kubernetes Cluster to install into - if not available, follow this tutorial
Any other cloud provider or local install (e.g. AWS, Minikube, OpenShift) can be used -
Helm installed - follow these instructions if you don’t
-
allow for dynamic provisioning of persistent volumes - otherwise you will need to manually create the volume
The install process is broken into two separate Helm charts; this is due to the fact that Apache Syncope doesn’t startup properly if the database used as internal storage is not fully initialized yet:
-
postgreschart; this will install the PostgreSQL database and configure a persistent volume and persistent volume claim to store the data -
syncopechart; this is the actual Apache Syncope install, which will deploy three separate pods (Core, Console, and Enduser)
The installation steps are:
-
Open a terminal and navigate to the
kubernetesfolder, wherever you downloaded it -
Set your actual values in
postgres/values.yaml -
Install PostgreSQL
helm install postgres --name postgres --namespace <YOUR_NAMESPACE> -f postgres/values.yamlWait until PostgreSQL is initialized (watch logs for confirmation)
-
Set your actual values in
syncope/values.yaml -
Install Apache Syncope
helm install syncope --name syncope --namespace <YOUR_NAMESPACE> -f syncope/values.yaml
3.5. Maven Project
This is the preferred method for working with Apache Syncope, giving access to the whole set of customization and extension capabilities.
|
Target Audience
Provides access to the full capabilities of Apache Syncope, and almost all extensions that are possible.Requires Apache Maven (and potentially DevOps) skills. |
3.5.1. Prerequisites
-
Apache Maven (version 3.0.3 or higher) installed
-
Some basic knowledge about Maven
-
Some basic knowledge about Maven archetypes.
3.5.2. Create project
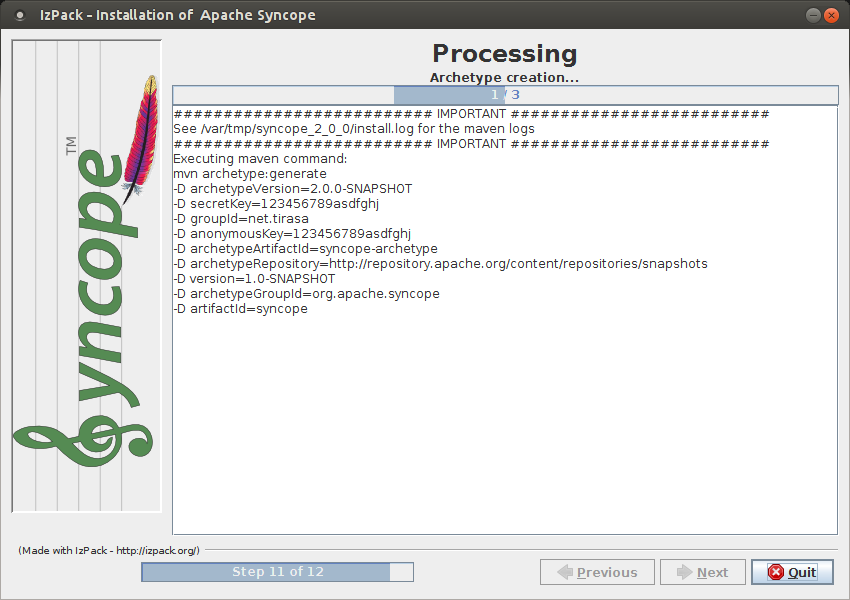
Maven archetypes are templates of projects. Maven can generate a new project from such a template. In the folder in which the new project folder should be created, type the command shown below. On Windows, run the command on a single line and leave out the line continuation characters ('\').
$ mvn org.apache.maven.plugins:maven-archetype-plugin:2.4:generate \
    -DarchetypeGroupId=org.apache.syncope \
    -DarchetypeArtifactId=syncope-archetype \
    -DarchetypeRepository=https://repository.apache.org/content/repositories/snapshots \
    -DarchetypeVersion=2.1.15-SNAPSHOT
|
Once the Maven project is generated, add the following right before |
The archetype is configured with default values for all required properties; if you want to customize any of these property values, type 'n' when prompted for confirmation.
You will be asked for:
- groupId
-
something like 'com.mycompany'
- artifactId
-
something like 'myproject'
- version number
-
You can use the default; it is good practice to have 'SNAPSHOT' in the version number during development and the maven release plugin makes use of that string. But ensure to comply with the desired numbering scheme for your project.
- package name
-
The java package name. A folder structure according to this name will be generated automatically; by default, equal to the groupId.
- secretKey
-
Provide any pseudo-random string here that will be used in the generated project for AES ciphering.
- anonymousKey
-
Provide any pseudo-random string here that will be used as an authentication key for anonymous requests.
Maven will create a project for you (in a newly created directory named after the value of the artifactId property
specified above) containing four modules: common, core, console and enduser.
|
As stated above, Apache Syncope 2.1 requires JDK 8. In case you need to deploy your project with JDK 11, add the
following right after Please note that, even with such addition, not all components in embedded mode will work as expected; production features are anyway fully functional. |
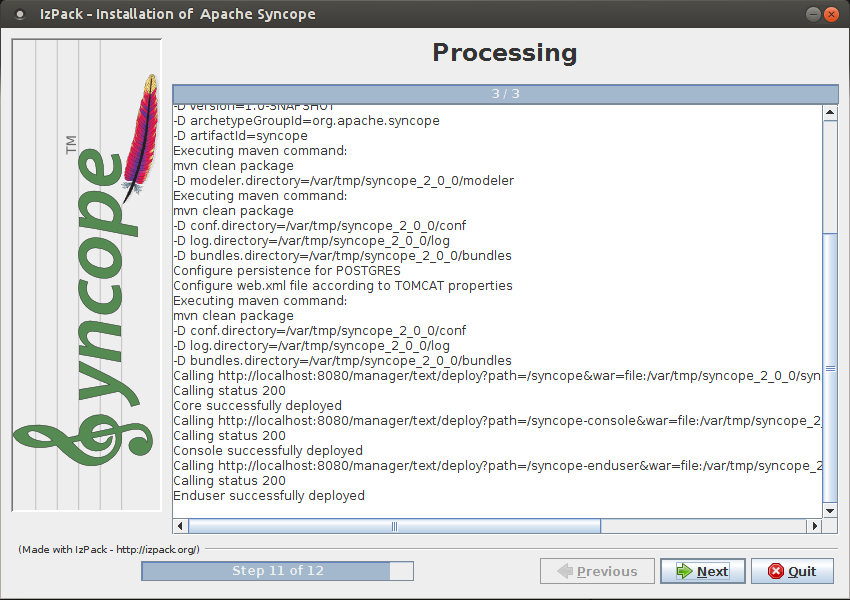
You are now able to perform the first build via
$ mvn clean installAfter downloading all of the needed dependencies, three WAR files will be produced:
-
core/target/syncope.war -
console/target/syncope-console.war -
enduser/target/syncope-enduser.war
If no failures are encountered, your basic Apache Syncope project is now ready to go.
|
Before actual deployment onto a standalone Java EE container, you need to further check the Customization chapter of the Apache Syncope Reference Guide. |
3.5.3. Embedded Mode
Every Apache Syncope project has the ability to run a full-blown in-memory environment, particularly useful either when evaluating the product and during the development phase of an IdM solution.
|
Don’t forget that this environment is completely in-memory: this means that every time Maven is stopped, all changes made are lost. |
From the top-level directory of your project, execute:
$ mvn -P all clean install|
The switch When building for production, instead, it is recommended to check the Customization chapter of the Apache Syncope Reference Guide. |
then, from the enduser subdirectory, execute:
$ mvn -P embedded,allPaths and Components
Log files |
Available under |
ConnId bundles |
Available under |
Complete REST API reference |
|
Swagger UI |
|
Administration console |
http://localhost:9080/syncope-console/ |
End-user UI |
|
Internal storage |
A SQL web interface is available at http://localhost:9080/syncope/db.jsp |
External resource: LDAP |
An Apache DS instance is available. |
External resource: SOAP |
An example SOAP service is available at http://localhost:9080/syncope-fit-build-tools/cxf/soap |
External resource: REST |
An example REST service is available at http://localhost:9080/syncope-fit-build-tools/cxf/rest |
External resource: database |
H2 TCP database is available. |
3.6. CLI
The command-line interface (CLI) client is an utility tool meant for interacting with Apache Syncope deployments from shell scripts.
|
Deprecation
Syncope 2.1 is the last major version providing CLI. As an alternative you can consider using the popular curl tool to invoke the
Syncope Core REST API services. |
Once downloaded and uncompressed, you will find a lib directory and two scripts: syncopeadm.sh and syncopeadm.bat,
which will be used depending on the operating system.
The installation process creates cli.properties, which contains all the required information to invoke the
Syncope Core REST API services.
The file content looks like the following:
syncope.rest.services=http://localhost:9080/syncope/rest
syncope.admin.user=admin
syncope.admin.password=QePSFVTnzwQowM4ohhaUYcE6aW47MVZ/
where:
- syncope.rest.services
-
the base URL where the Apache Syncope REST API services are listening;
- syncope.admin.user
-
the username which will be used to invoke the Syncope APIs;
- syncope.admin.password
-
the password for the admin user configured above.
As shown above, the password value is encrypted for security reasons.
Help message
Usage: install [options]
  Options:
    --help
    --setup
    --setup-debug
3.6.1. Installation
After the file is unzipped you can start with CLI client using the syncopeadm file.
If you have tried to run a CLI command before the installation process, the script will return
- Error: It seems you need to first setup the CLI client. Run install --setup.So, as suggested, you have to run the install command to use the CLI:
$ ./syncopeadm.sh install --setupA successful result will be:
You are running: install --setup

###############################################
#                                             #
# Welcome to Syncope CLI installation process #
#                                             #
###############################################

Path to config files of Syncope CLI client will be: ./
- File system permission checked

Syncope server schema [http/https]: http
Syncope server hostname [e.g. localhost]: localhost
Syncope server port [e.g. 8080]: 9080
Syncope server rest context [e.g. /syncope/rest/]: /syncope/rest
Syncope admin user: admin
Syncope admin password: password
Installation parameters checked on Syncope core version: 2.1.15-SNAPSHOT

###############################################
#                                             #
#           Installation successful           #
#     now you can use Syncope CLI client      #
#                                             #
###############################################
During the installation you have to provide:
- Syncope server schema
-
the http protocol used by the Apache Syncope core, it will be http or https;
- Syncope server hostname
-
the hostname where the core is deployed;
- Syncope server port
-
the port where the services are listening;
- Syncope server rest context
-
the context where the rest services are deployed (/syncope/rest is the default);
- Syncope admin user
-
the user with the permission to call the Syncope APIs;
- Syncope admin password
-
the user password.
3.6.2. Troubleshooting
Various error messages are possible on installation. Here are some sample error messages:
Syncope unreachable (or wrong address):
Provided address: http://localhost:9080/syncope/rest

###############################################
#                                             #
#       Provided address is unreachable!      #
#         Check it and if it is wrong         #
#        START the installation AGAIN!        #
#                                             #
###############################################
Authentication failed:
###############################################
#                                             #
#   Username or password provided are wrong   #
#        START the installation AGAIN!        #
#                                             #
###############################################
As the message suggests you have to start the installation again when this error occurs.
3.6.3. Debug
To work with the debug environment provided by Syncope we added a particular installation option for it. It enough to run the script with the --setup-debug option
$ ./syncopeadm.sh install --setup-debugYou are running: install --setup-debug
###############################################
# #
# Welcome to Syncope CLI installation process #
# #
###############################################
Path to config files of Syncope CLI client will be: ./
- File system permission checked
Installation parameters checked on Syncope core version: 2.1.15-SNAPSHOT
###############################################
# #
# Installation successful #
# now you can use Syncope CLI client #
# #
###############################################3.7. Eclipse IDE Plugin
The Eclipse IDE plugin allows remote management of notification e-mail and report templates.
3.7.1. Installation
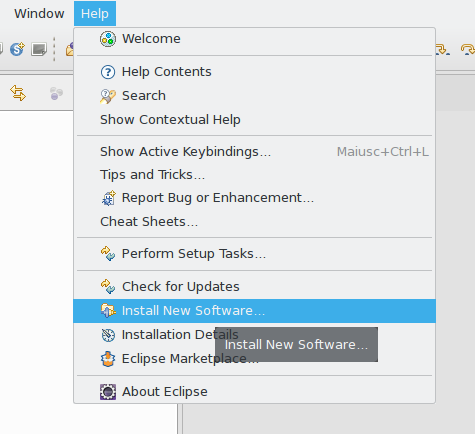
After download, start the most recent Eclipse IDE distribution then go to
Help > Install New Software:
Click on Add:

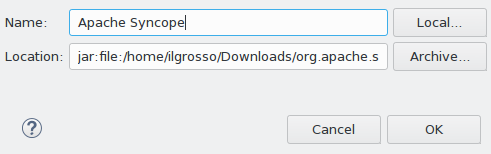
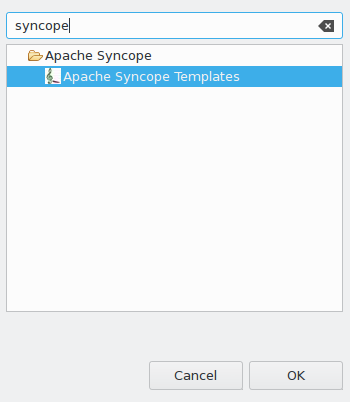
Click on Local then Archive and find the downloaded zip file:

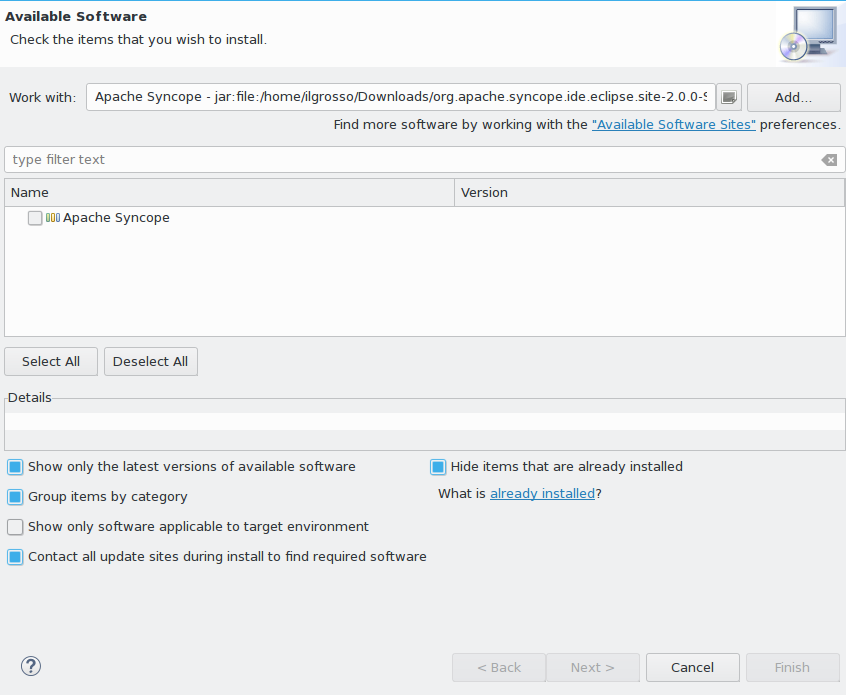
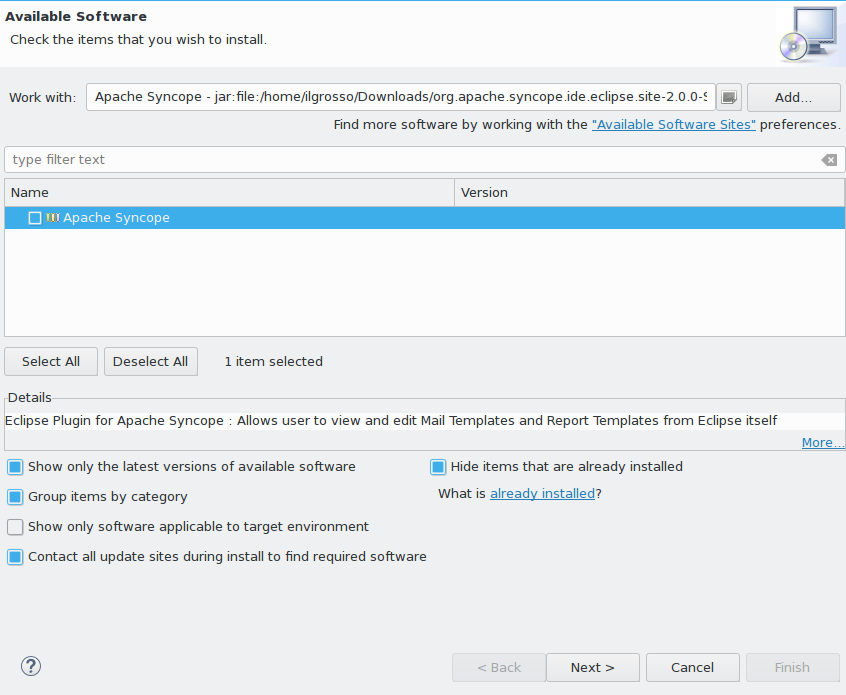
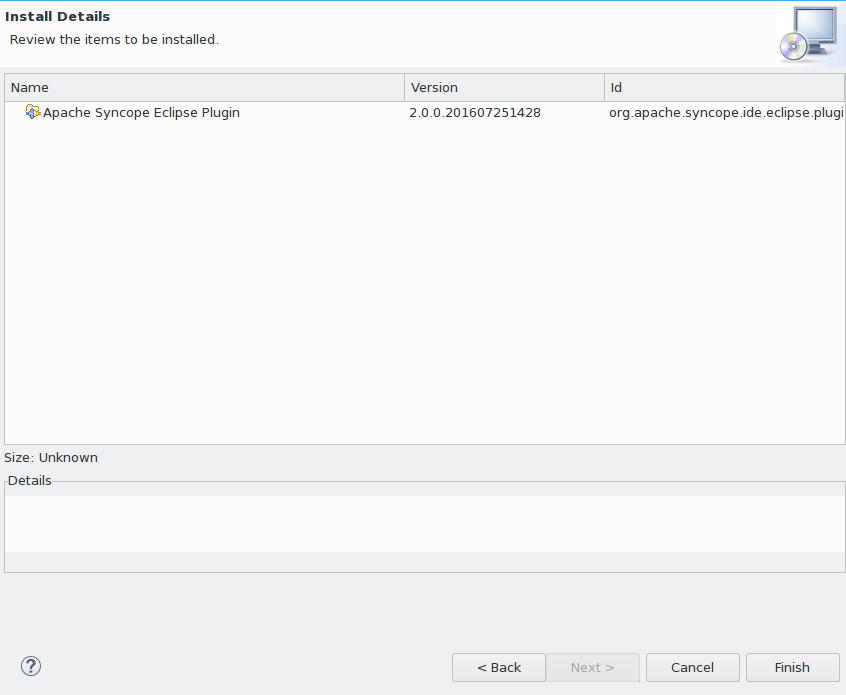
Select Apache Syncope and click on Next:
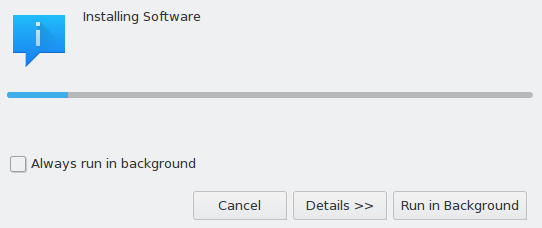
Click on Finish and wait for installation to complete:
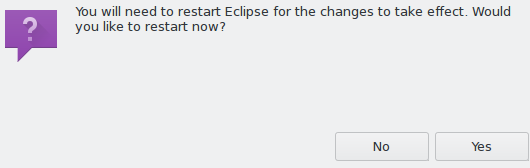
3.7.2. Setup
After Eclipse IDE restart, go to Window > Show View > Other
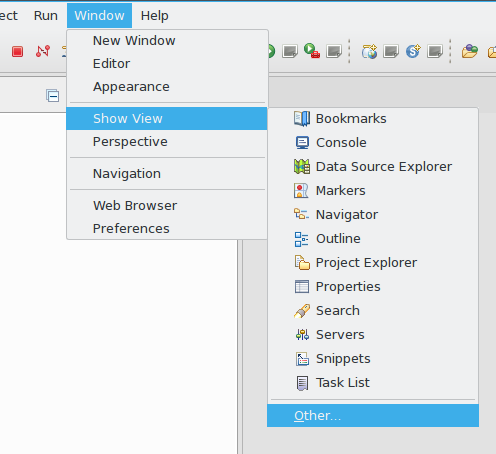
Select Apache Syncope Templates:
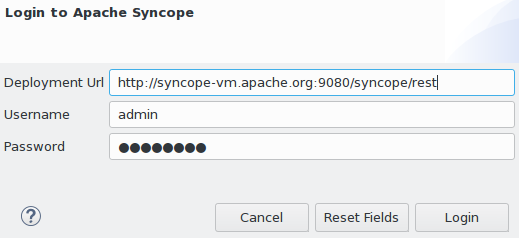
In the new view, click on Login:

Provide the base URL for Apache Syncope deployment, username and password:
If the information above is correct, two folders should now appear:

By double-clicking on each folder, the list of available templates is shown:
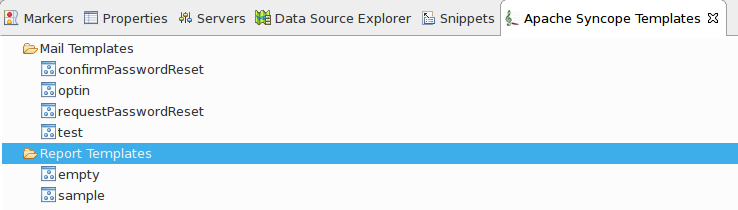
Each template is now ready for authoring or removal; new templates can also be created.
3.8. Netbeans IDE Plugin
The Netbeans IDE plugin allows remote management of notification e-mail and report templates, and remote editing of Apache Groovy implementations.
3.8.1. Installation
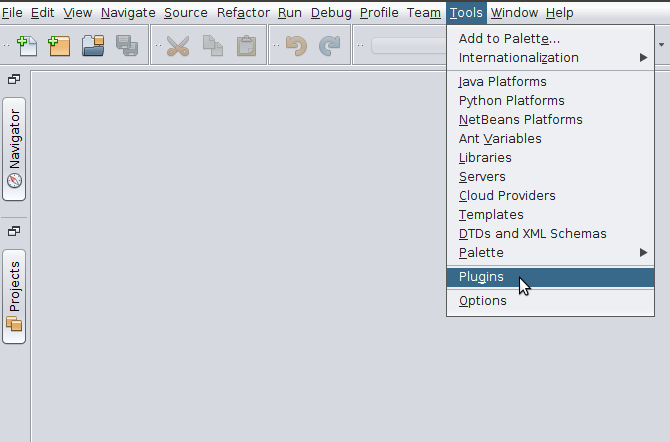
After download, start the most recent Netbeans IDE then go to
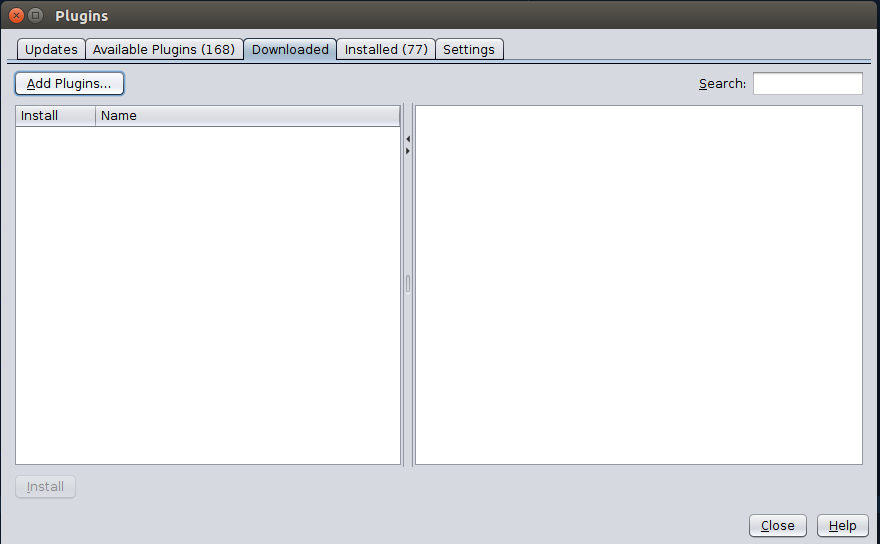
Tools > Plugins:
Click on Downloaded > Add Plugins…:
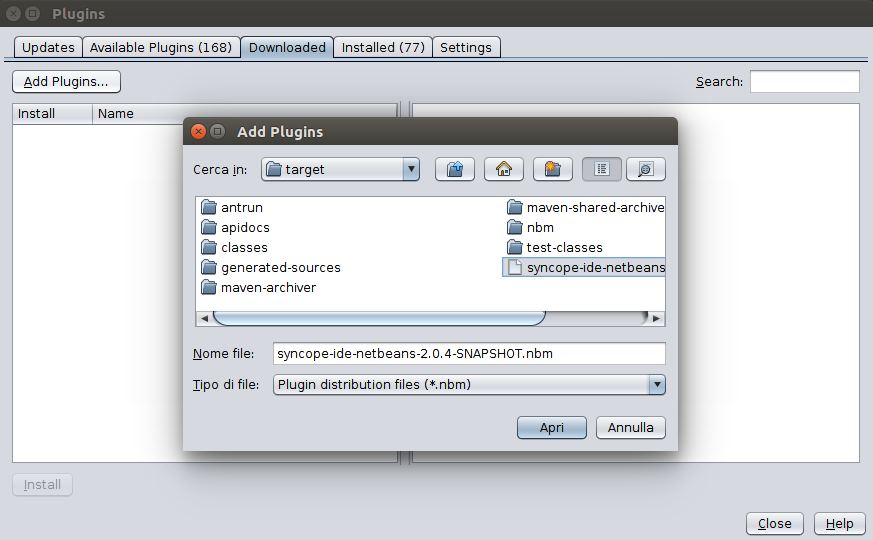

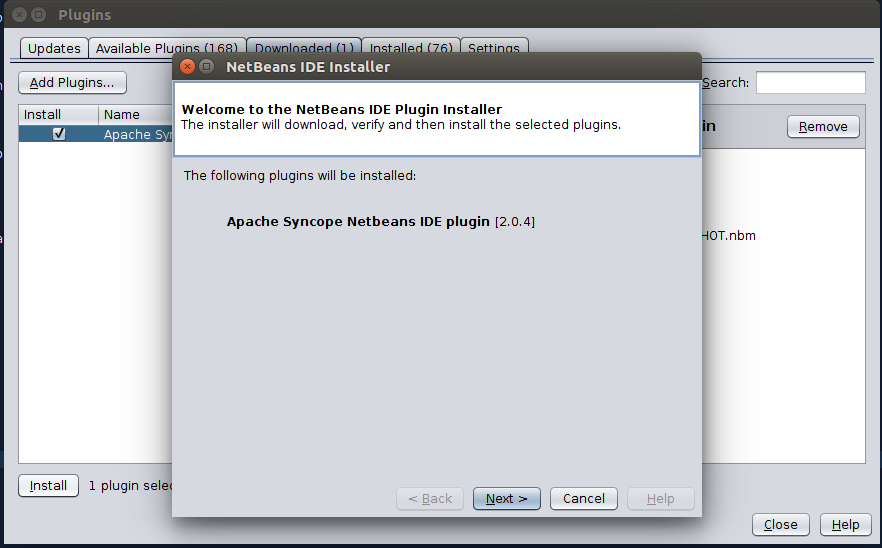
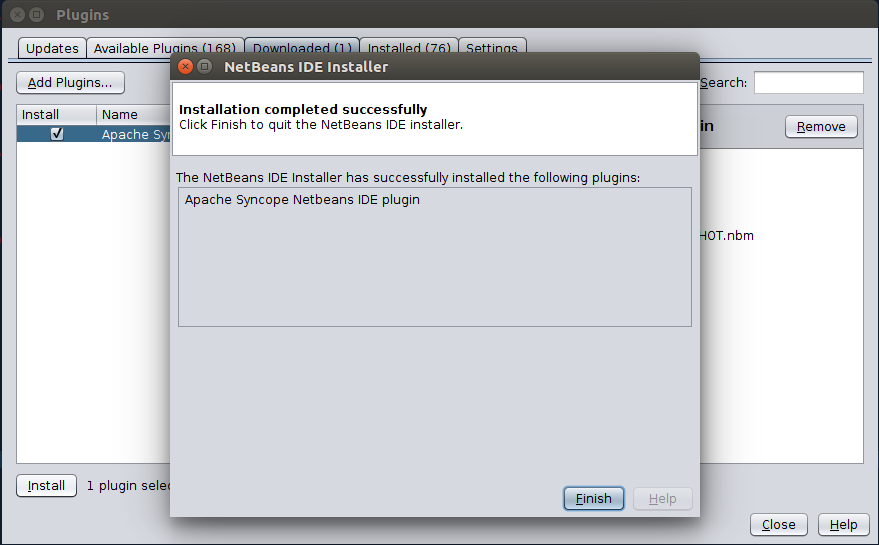
Select Apache Syncope Netbeans IDE Plugin and click on Install:
3.8.2. Setup
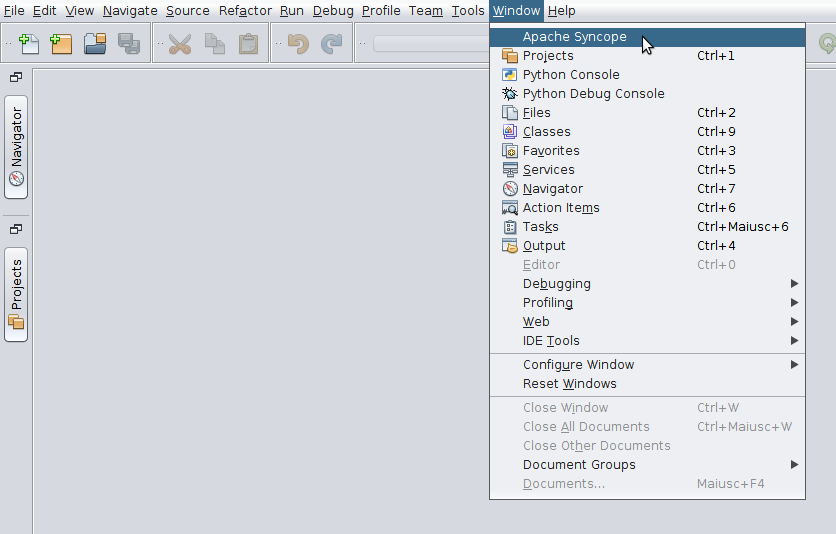
Once installed go to Window > Apache Syncope:
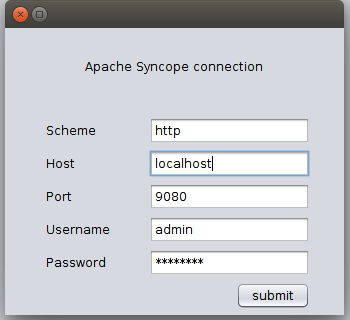
The first time the plugin is run, it will prompt for connection details:
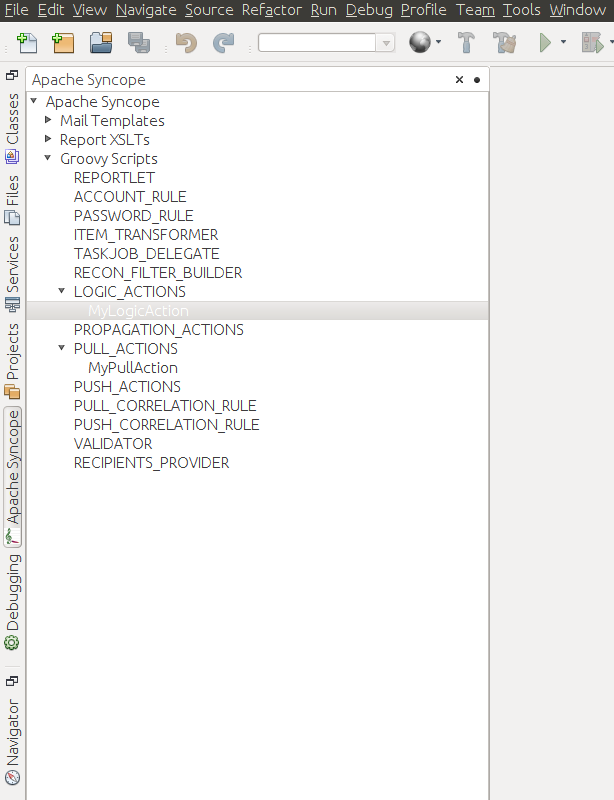
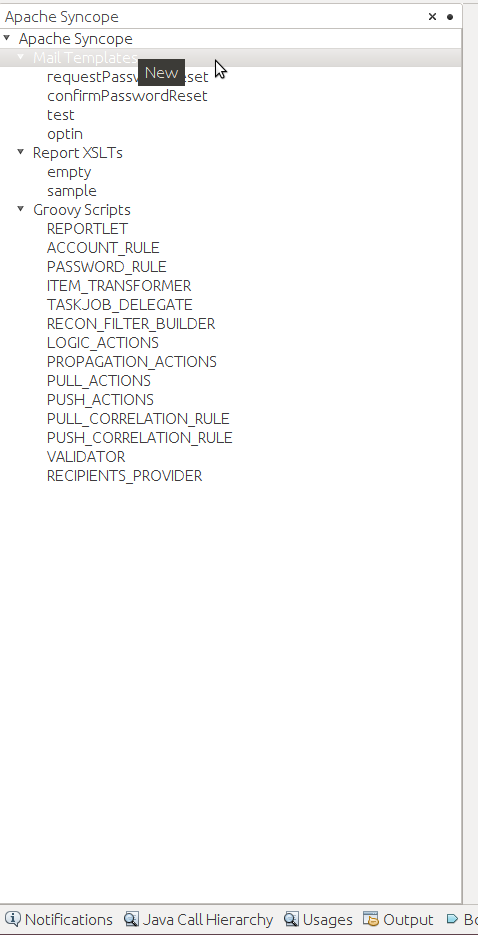
Once a connection to the given Apache Syncope deployment is established, a panel showing Mail Templates, Report XSLTs and Groovy implementations will appear on the left; by double-clicking on each folder, the list of available items is shown:
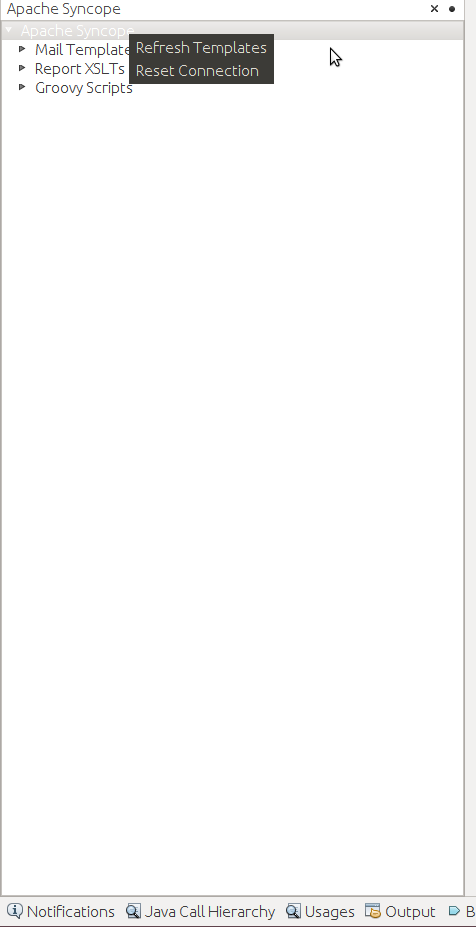
To refresh the list of available items, or to update the connection details, right-click on the
Apache Syncope root node:
To create a new item, right-click on the Mail Templates, Report XSLTs or Groovy Implementations folder and then
click on New label:
|
Before creating or editing a mail or report template, a modal window will be shown to select the edit format: 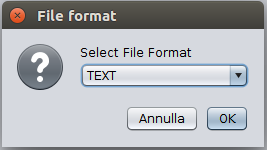
|
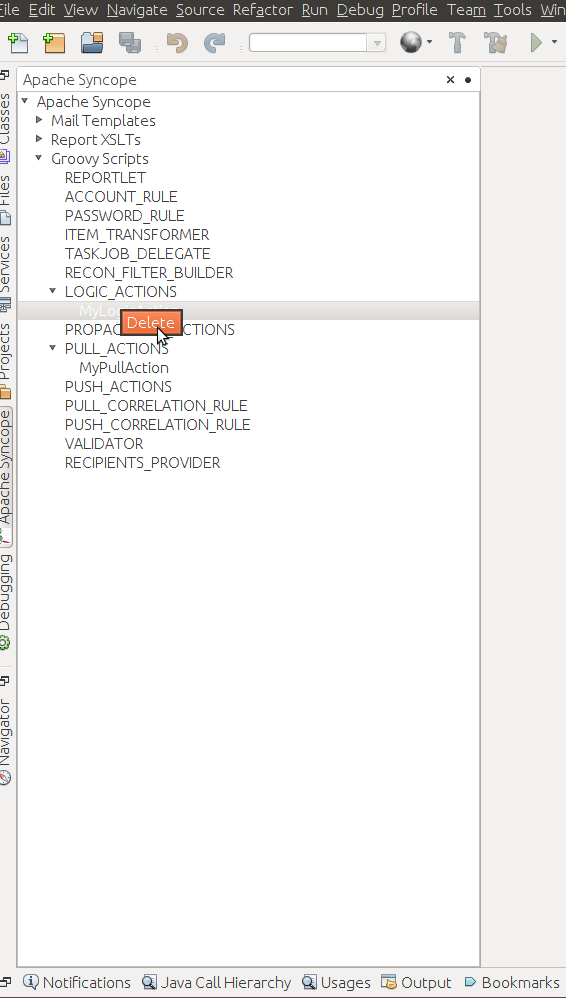
To edit am item, double-click on the item name and an editor will appear. On save, the item content will be uploaded to the configured Apache Syncope deployment.
To delete an existing item, right-click on the item name and then click on Delete:
4. Moving Forward
Once you have obtained a working installation of Apache Syncope using one of the methods reported above, you should consider reading the Apache Syncope Reference Guide. to understand how to configure, extend, customize and deploy your new Apache Syncope project.
Before deploying your Apache Syncope installation into production, it is essential to ensure that the default values for various security properties have been changed to values specific to your deployment.
The following values must be changed from the defaults in the security.properties file:
-
adminPassword - The cleartext password as encoded per the
adminPasswordAlgorithmvalue (SSHA256by default), the default value of which is "password". -
secretKey - The secret key value used for AES ciphering; AES is used by the use cases below:
-
if the value for
adminPasswordAlgorithmisAESor the configuration parameterpassword.cipher.algorithmis changed toAES -
if set for Encrypted Plain Schema instances
-
for Linked Accounts' password values
-
to securely store Access Token’s cached authorities
-
within some of the predefined rules used by Password Policies
-
-
anonymousKey - The key value to use for anonymous requests.
-
jwsKey - The symmetric signing key used to sign access tokens. See section 4.4.1 "REST Authentication and Authorization" of the Reference Guide for more information.
Note that if you installed Syncope using either the installer or the maven archetype methods, then you will have already supplied custom values for "secretKey" and "anonymousKey". Both installation methods will also query for "jwsKey", and the installer method will prompt for the "adminPassword" as well.